

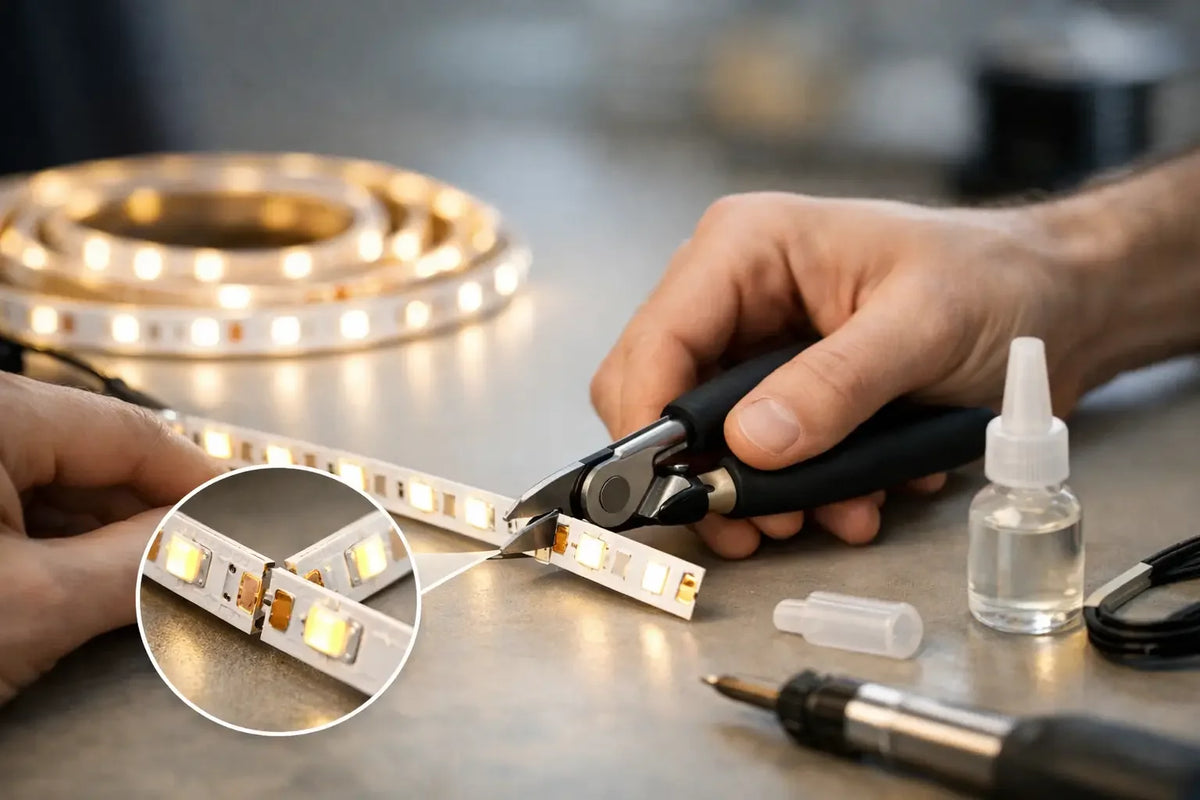
An LED strip that is too long can spoil even a perfectly designed detail. An end hidden behind a cabinet, a folded corner, or a few extra centimeters under a shelf unnecessarily detract from a clean impression. The good news is that you can shorten an LED strip at home yourself. You just need to respect the cutting points, finish the cut correctly, and avoid confusing a standard strip with a digital one.
Shortening isn't just a technical step. It is the final adjustment that determines whether the light follows the furniture, highlights a wall, or creates an elegant line without distracting overlaps. Whether lighting a kitchen, a gaming corner, a display case, or a company interior, precision translates directly into the resulting atmosphere.
When an LED strip can be shortened
Most classic LED strips can be cut, but never just anywhere. On the strip, you will find repeating marked sections, usually with a scissors symbol or a short line drawn across the copper contacts. Only here is the circuit designed to continue working after being cut.

The length of one cutting segment depends on the type of strip and its voltage. For 12V strips, it is often around 2.5 to 5 cm; for 24V variants, it may be longer. Practically, this means that the final length sometimes cannot be fine-tuned to the millimeter. If you are missing two centimeters to reach an exact corner, do not try to cut the strip outside the mark. It is better to subtly adjust the routing in the profile or end the strip one segment earlier.
Difference between standard, RGB, and addressable strips
A single-color LED strip generally has two contacts, marked plus and minus. An RGB strip uses four contacts – a common pole and channels for red, green, and blue. RGBW usually has five contacts. You can shorten them according to the marked lines just like the single-color version, only when reconnecting, you must accurately connect all channels.

Addressable or digital LED strips deserve special attention. Individual diodes or their groups can light up differently because they receive a data signal. Cutting is only possible at designated points, and the strip also has a data input and output direction, often marked with an arrow. Reverse wiring can cause part of the strip to not react correctly, even if it does light up.
Not every lighting solution is intended for home modification. Do not cut the power cord, silicone neon, or structure of a finished LED neon sign or custom LED logo without consultation. These projects are designed as a whole to maintain their shape, performance, and safe power supply.
How to shorten an LED strip step by step
First, unplug the power supply from the socket. It is not enough to just turn the light off with the remote – voltage may still remain in the installation. Lay the strip out on a clean, flat surface and measure the required length, including space for the connector, cable, or end cap. With an aluminum profile, make sure the end cap does not take up space within its internal length.
Then, find the nearest marked cutting line. Use sharp scissors and make a straight cut exactly through the middle of the copper pads. Blunt scissors can crush the strip, tear the protective layer, or damage the contacts that you will need when connecting another cable.

After cutting, connect the power and briefly check that the remaining part lights up. Do this before sticking it into the profile or installing it under the cabinet. If the strip does not react, look for the problem first in the connector, polarity, or power supply. A straight cut made at the marked location itself will not affect the strip's functionality.
If the cut end is to remain freely visible, protect it with an end cap. For a strip hidden in a profile, this is mainly for a clean look. In a damp environment, however, protection is essential because exposed copper pads can oxidize or short-circuit upon contact with water.
Connector or soldering?
If the strip just ends after being shortened, it needs no further connection. But if you want to lead a cable from it to the power supply, connect two sections, or bypass a corner, you have two options: a quick connector or soldering.
A quick connector is convenient for a short home installation. You open the latch, slide the strip in so that the contacts sit on the metal pins, and snap the connector shut. It is especially suitable where the connection will remain accessible and free from mechanical stress. Its weak point is sensitivity to imprecise seating and lower durability during long-term operation or in places where the cable is moved.
A soldered joint is smaller, stronger, and, if done correctly, more reliable. However, it requires a steady hand, a soldering iron with suitable power, and basic experience. Excessive heating can damage the pads or surrounding diodes. For RGB strips, always check the contact markings before soldering, as an error in one channel will change the colors or disable some controller functions.

For a design-clean result, hide the connections in an aluminum LED profile. The profile also improves cooling for the strip, protects it from dust, and creates a straighter line of light. Additionally, a diffuser softens individual diode dots, which is especially useful on visible walls, in niches, or above a work surface.

Waterproof LED strip needs to be re-sealed
Strips with IP65 protection or higher usually have a silicone layer. Before cutting, carefully expose it at the contact point so the copper pads are easily accessible. After connecting the cable or connector, the cut must be re-sealed with a suitable end cap and a neutral silicone intended for electronics.

Do not apply just any workshop sealant to the end. Some sealants can release substances while curing that attack metal contacts. If the strip is to work outdoors, in a bathroom, or near a sink, do not underestimate the connection between the strip and the power cable either. Water usually finds its way in exactly there.
Strip protection also does not mean it is automatically suitable for permanent immersion in water. The entire installation is decisive – the power supply, connectors, cable glands, and mounting method. For outdoor signs and light decorations, it pays to design the solution as a whole, rather than just choosing a strip with a higher IP number.
LED strip not lighting up after shortening – what to check
If the strip remains dark after shortening, it is usually not a faulty strip, but a minor issue in the wiring. Proceed from the simplest:
- Power. Is the power supply plugged into the outlet and is its indicator light on? Does it have sufficient power for the length and type of strip?
- Polarity. Plus must lead to plus and minus to minus. For RGB and RGBW strips, also check the order of the color channels.
- Connector or joint. Pull the strip out of the quick connector and push it back in until it hits the stop. A soldered joint must not be dull and cracked (a so-called cold joint).
- Cut location. If the cut was made outside the mark, the last section will not light up. Shorten the strip to the nearest correct cutting point and reconnect it.
- Data direction. For an addressable strip, the controller must lead to the DIN input – in the direction of the arrow on the strip.
If the strip lights up but dims at the far end, it is more likely a voltage drop over a long route. Providing power from the other side or choosing a stronger power supply will help.

Most common mistakes that cost time and light
The most common problem arises when cutting outside the marked segment. Sometimes only the last part stops working, other times a longer section may be damaged. The second mistake is measuring without taking into account the connector, profile, and space for cable bending. The strip might fit in length, but the power supply won't fit or creates an unsightly arc.
It is also common to overload a long strip powered from only one side. At the far end, brightness may drop, and with white light, a change in shade can sometimes occur. Shortening the strip may mitigate this problem, but it will not fix an inappropriately chosen power supply or a route that is too long. For larger installations, power is therefore brought in from multiple points based on the strip's power and the installation design.
Another mistake is sticking the strip to a dirty, greasy, or uneven surface. The self-adhesive layer is not all-powerful. Degrease the surface, let it dry, and for more demanding installations, use a profile, mounting clips, or quality double-sided tape. A peeling LED strip does not look good and is also harder to cool.
How we work with LED strips when producing LED neons
An LED neon sign is essentially an LED strip at its core – hidden in a silicone or PVC diffuser that turns individual dots into a continuous line of light. During production, we face the same questions as you at home: where to end the strip, how to seal the joints, and where to bring in power. The difference is that we test every finished sign for several days before shipping and provide a 2-year warranty.
Do you want light that you don't have to cut or solder? Take a look at custom LED neon – the power supply and dimmer with a remote control are included in the package.
Frequently asked questions
Can every LED strip be shortened?
Most standard LED strips can, but only at marked cutting points. Some special strips, such as those for mains voltage 230 V, are shortened only in longer sections and strictly according to the manufacturer's instructions – for these, we recommend entrusting the work to an electrician.
Where exactly should an LED strip be cut?
Through the middle of the copper pads on the marked line, usually with a scissors symbol. For 12V strips, the cutting point is usually roughly every 2.5–5 cm; for 24V strips, they are further apart.
How to connect two pieces of LED strip?
With a quick connector (no tools needed) or by soldering. For permanent and visible connections, soldering is more reliable; for a quick home installation, a connector is sufficient. Always observe polarity and, for RGB, the channel order.
Can I shorten a finished LED neon sign?
We do not recommend it. LED neon is designed as a whole – the shape, length, and power are calculated for a specific sign. If you need a different size, we will make a custom sign. We will send you a design and price for free within 24 hours.
Does shortening affect the brightness of the strip?
A correct cut will not affect brightness. On the contrary, a shorter strip has less voltage drop, so it may shine more evenly – provided the power supply matches the length and power of the strip.
Before you pick up the scissors, decide on the final result
Shortening an LED strip is easy once you know where the power supply will be, where the cable will lead, and how the end will be protected. These very details separate a quick improvisation from light that feels thoughtful in a space and lasts.
If you want to turn a simple line into a distinctive interior element, start with light that has a clear purpose. Whether it highlights a logo, a countertop, a gaming setup, or a quiet corner of your home, a precise cut is a small step toward giving the space its own glow.